Have you ever wondered how accurate the lumen rating is on the flashlights you have purchased?
Are you looking to add some credibility to your own flashlight reviews? Do you simply want to know just how powerful your flashlight is? Maybe you want to know if the lights on our brightest flashlight buyers guide here really are that bright.
If you answered yes to any of these scenarios you need to learn how to measure lumens of a flashlight inside your own home.
Measuring lumen output inside your home can be done in a variety of ways. None of the methods we include in this article will deliver you lab-quality results unless you happen to have a lab and required lab equipment inside your home. Results obtained with these methods will vary but are considered fairly accurate when done correctly.
How to Measure Lumens from Home
First off go here if you are confused about what lumens on a flashlight are, what they represent and how many you might need.
If you want to measure lumens from your own home you are going to need to purchase a light or lux meter. These meters are used to obtain lux readings. The readings are then converted into lumens using a multiplier. Check our article about the difference between Lux and Lumens.
To obtain the multiplier, follow these simple steps:
- Turn the light meter on and switch to Foot candles rather than lux.
- Increase the range of the light meter until you have zeros straight across.
- Use a flashlight that you already know the lumens of.
- Shine the light at the sensor and wait until the reading starts to stabilize. Lights will be brighter when first turned on, so wait at least a minute for the lumens to level out.
- Grab a calculator and enter in the number of lumens from the flashlight you used. This is why you need to already know the number of lumens.
- Divide the number by a number of foot candles your light meter gave you in step 4.
- The answer will then be the number you multiply your readings by to obtain your lumen measurement.
- You can also watch a portion of this video to walk you through the process.
#1 – Integrating Spheres:
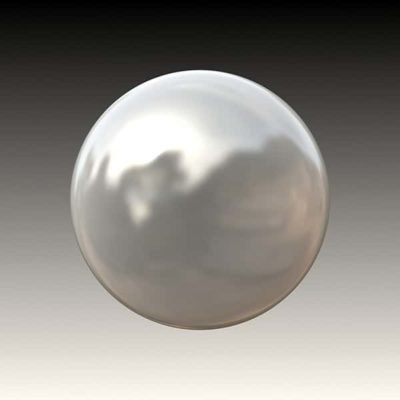
Lab quality integrated spheres are expensive.
Most flashlight enthusiasts don’t own one simply because of how expensive they are. Instead of buying a lab quality integrated sphere flashlight enthusiasts have learned to create their own out of various materials.
The difference between the lab quality integrated sphere and the homemade ones is the accuracy of the results and the materials used. The integrated sphere is covered with a white reflective coating to ensure the light is evenly distributed throughout the sphere. Small holes or ports are used for entry and exit points for the light being tested.
The optical properties of the integrated spheres lining greatly affect the results. Different coatings are necessary for different wavelengths.
#2 – Camera:
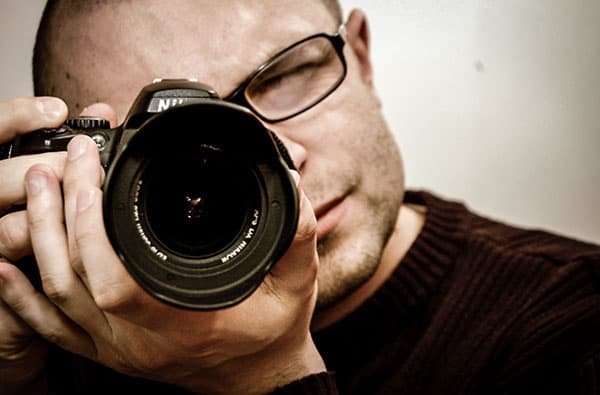
Although not as accurate as a luxmeter with an integrated sphere a camera with the ability to display shutter speed and aperture while in auto or program mode can give you estimated lumen readings.
If using a camera you want a dark room with no ambient light with a mat white wall. Place the light exactly 3 feet away from the white wall and ensure it is in the on position. Set the ASA to 100 to obtain readings on shutter speed and aperture. Use these numbers to obtain an EV value. Convert the EV value to LUX based on this chart.
#3 – Lumen Tube:

With a lumen tube, you are not going to get lab grade results, but you can still obtain a pretty accurate reading. One of the greatest things about the lumen tube is it can be made using different sized PVC pipe.
This allows for adjustment based on the diameter of the bezel. The following directions will be given using 4 inch PVC, but you can go smaller or larger depending on what size you need.
Making the lumen tube is going to require three 4-inch elbows and a PVC cap. You will also need a clear piece of anti-reflective glass, such as Truview Museum Glass and a piece of foam.
Connect two PVC elbows together to form a “U” shape. Connect the third elbow to the end of the “U” ensuring the bend points upwards. Cut a small hole in the cap the same size as the luxmeter sensor. Place the cap inside the end of the “U” and secure in place with black duct tape.
Cut the glass to form a lens for the other end of the lumen tube. The glass needs to sit securely inside the open end of the lumen tube. Using foam create a shroud that will fit over the bezel of the flashlight. The shroud will prevent light from escaping the tube from the open end. Place the light inside the tube with the shroud and turn it on. Obtain the reading from the lux meter.
#4 – DIY Integrating Sphere:

Not everybody can afford to purchase an integrating sphere to measure lumen output. Flashlight enthusiasts from all over have devised a way to make an integrating sphere from home. These integrating spheres might not look as nice, but they seem to work very well. Most homemade versions, when done correctly, seem to provide accurate results.
To make your own integrating sphere you will need a 16-inch smooth foam ball, a roll of black duct tape, a Styrofoam packing sheet, a cardboard box, and some 2 inch PVC pipe. You will also need a luxmeter to record your readings.
Start by drawing and cutting a 2-inch hole in the Styrofoam ball. Insert a section of 2-inch PVC pipe into the hole. This will be your flashlight tube. Use black duct tape to seal the tube inside the hole. Use more tape than you think you might need. The point of sealing the tube is to prevent any light from seeping in.
On the opposite side of the flashlight tube, you will need to draw and cut out another 2-inch hole. This hole is going to be for the sensor. Place a smaller section of 2-inch PVC pipe into the hole and completely seal with black duct tape. The PVC pipe should be entirely covered with the black duct tape. Next, you will need the Styrofoam packing sheet to act as a baffle.
The sheet needs to be pinned inside the Styrofoam ball to prevent light from the flashlight getting to the sensor.
Place the luxmeter on the sensor port to ensure it fits. Use a cardboard box large enough to hold the Styrofoam ball. Cut a notch in the side where the flashlight tube will rest. Secure the two halves of the Styrofoam ball together with black duct tape.
Place inside the cardboard box, lining up the flashlight port with the notch. Use black duct tape to secure the ball inside the box. Mount the luxmeter and cover with a cloth to block out any ambient light. Insert flashlight into the tube while it is turned on. Gather your readings and divide by 36 to get your estimated lumens.
#5 – Paper Mache Integrated Sphere:

This is a homemade sphere that is sure to impress. To make this integrated sphere you will need a large rubber ball, plastic picnic tablecloth, newspaper strips, glue, and water. The glue and water should be a 50/50 mix to achieve the best results.
Start by covering the rubber ball with the plastic strips. Once covered with plastic you can begin adding the strips of newspaper. You will probably use up to 2 dozen layers of newspaper. How you know when it is enough is by gently squeezing the form once dry. If you can feel the ball underneath you need more layers. Continue adding layers until it has a solid feel to it.
Once dry and solid you need to cut along the middle of the ball to create two equal halves. Once cut in half remove the rubber ball and plastic wrap. Paint the inside of each half with a white matte paint. You will need several coats to cover the newspaper print.
Once the paint dries cut two ports into one of the halves. One port is for the flashlight entrance the other is for the light meter sensor. The ports need to be at a 90-degree angle to one another. Next, add a baffle to create a shadow over the sensor port. This is done to prevent light from directly hitting the sensor.
Use duct tape to secure the two halves of the sphere together. Then place a few more layers of Paper Mache to the sphere to firm things up. You can spray paint the outside of the sphere or leave it as is. If spray painting it go for a dark color to block out any ambient light. Depending on the size of the flashlight’s bezel a shroud will need to be used in conjunction with the flashlight port.
#6 – Styrofoam Cooler:

Using a cooler is similar to using a Styrofoam ball to make an integrated sphere. The biggest difference is going to be in the shape. To make an integrated sphere out of a Styrofoam cooler you will need the cooler, a metal bracket, and black duct tape.
Cut a hole into the side of the cooler. This hole is where the flashlight will be placed. Next, you will need to drill two holes above and to the side of the larger hole. These holes will be used to hold the sensor in place during testing.
The idea is to shine the light on the back wall of the cooler and have it reflected back to the sensor. Mounting the sensor on the same side as the flashlight port prevents the need of a baffle as the light is never shining directly on the sensor.
Close the lid of the cooler and seal with black duct tape to prevent any light leakage. Place a flashlight equipped with a shroud into the port and turn the light on. You can also cover the cooler with a sheet to prevent ambient light from affecting your readings.
#7 – Ceiling Bounce:
Ceiling bounce is not the best way to accurately measure lumen output, but it is a quick and easy way to compare the brightness of lights. With ceiling bounce, you can use a luxmeter to get an estimate on a number of lumens produced. Ceiling bounce tests is a great way to compare if your new light is brighter than your old light.
To perform a ceiling bounce test you need to find a room with no ambient light. White walls are preferred for this test, but as long as the ceiling is white other colors on the walls can work. Place the luxmeter on the floor ensuring the detector is pointing up towards the ceiling. Place the light on the floor, so the LED is pointing up at the ceiling. Turn the light on and record the number in lux from the luxmeter.
#8 – Milk Carton Integrating Sphere:

You can effectively use a milk or juice carton. The first thing you want to do is thoroughly wash the inside of the carton with hot water and dish soap. Allow the carton to dry before proceeding with the next step.
Cover the entire carton with aluminum foil. This step is necessary to prevent light from leaking out of the carton.
Cut two holes inside the carton. The first hole will need to be cut on the top side of the carton directly in the center. The diameter of the hole will depend on the size of the lights you will be testing. The second hole is cut from the bottom of the carton. The hole’s diameter needs to be just big enough to hold the sensor from the light meter.
Some people feel the inside of the carton is too shiny to provide accurate results. You have the option to cut the flat bottom off the container and paint the inside of the carton with a matte white paint. Once painted you can add the bottom back on and secure with black duct tape to prevent any light leakage.
A baffle needs to be created and added to the light port to prevent the beam from the flashlight from directly hitting the sensor. A baffle can be created with a 1 inch by 3-inch strip of paper. Tape the paper to the flashlight port so it extends into the carton by ½ inch. The baffle should cover 180 degrees.
Some kind of foam should also be used to construct a shroud for the flashlight to prevent light leakage from the port.
To use the milk carton integrated sphere you need to attach the sensor to the sensor port and secure it in place. Place the flashlight in the top port along with the shroud and turn it on. Cover the carton with a sheet to block out all ambient light and wait one minute to obtain your reading. Convert the light meter reading to lumens.
How to Measure Lumens of a Flashlight Final Thoughts
Measuring the lumens of the flashlights you have in your home can simply satisfy your curiosity or it can add credibility to any reviews that you do. The most accurate way to measure lumens from home is to invest in a lab quality integrated sphere, but most of us don’t have that kind of money.
Homemade integrated spheres will provide accurate results if made correctly, unless you are trying to measure moonlight mode. Ceiling bounce tests and cameras should only be used as a last resort.
Something else to consider when looking at lumens is that different colors of white stand out to your eyes better and that can not really be calculated by a measurement. For instance, cool white stands out more than neutral white.
Thank you for visiting BestTacticalFlashlights.net. Please take a look at our flashlight reviews or our flashlight buyers guides for all your flashlight needs.